I clicked layout and then, on the widgets page in my dashboard, went to the header area at the top to click edit. I chose to upload an image from my computer, and chose the option to allow my image to load behind my text (Placement: "Behind title and description").
Clicked save, and went to look at my new page. Oops, had a huge image there, could hardly see the white text of the blog title and description over it, and the image was off to the left mostly. Looking at it, I decided I quite liked the rather large image ( I may change the image later, and from time to time, and possibly use not-so-large ones, but the one I'm speaking about at the moment is a picture of a huge wave crashing onto sand (see more pictures taken at that beach spot on the same day) - hm, just thought, if I change it later, information I have planned for further down in this post won't make sense, so I guess I should upload it here too), but I wanted it centred, filling up the whole background space, other than a slight border at the ends. What I did like to see, at least, is that my picture was not distorted, the background Blogger panel just moved down with it, leaving a little border at the bottom and at the left (and a too-big border on the right).
So, needed to do some maths and measuring. (oh dear!) ("Tony, heeeelp pleeeease!")
Tony to the rescue. Tony did some measuring for me, using a Firefox add-on. Get it here (free). We needed to determine the width of the background panel. If you are using the same theme that I am, well, I can save you some time, as the width decided for my image of the wave, is 710 pixels. That leaves a thin little border of the natural blog's panel colour showing through at the sides of the image (and at the bottom of the image.)
We only had to worry about the width of the image, as the height would just push the background panel down behind it, keeping the background panel (with narrow borders at the sides and bottom) nicely in place.
We also needed to determine how much space my description above the image was taking up. We wanted to add the colour of the panel to the top of my image (and save it as a new image), so that the white writing would be clearly visible on it, instead of camouflaged on the image.
One can get the exact colour of part of a website page by taking a screenshot of the page, saving the image as a .jpeg and opening it in Photoshop to use a colour picker. Or one can use an application like Color Scheme Designer 1.0b (free.)
A height of 130 pixels was needed for the blog’s title and description. I added it onto the top of my wave picture, in Photoshop (after Tony told me the measurements for the top area – 130 x 710) and then saved the new image. This was done by opening a new file 130 pixels higher than the wave picture, then the wave picture was copy and pasted onto this blank image – the sides and bottom fitted snugly (the border around them on the blog appears automatically, using the measurements I did), and the top area was filled in with the background colour (#445566)
Deleted the “mistake” image on the blog by simply clicking “remove” in the header edit area of my dashboard, and then uploaded the new one – it looked great!

But, being me, I wanted it to look even better, and a little more personal.
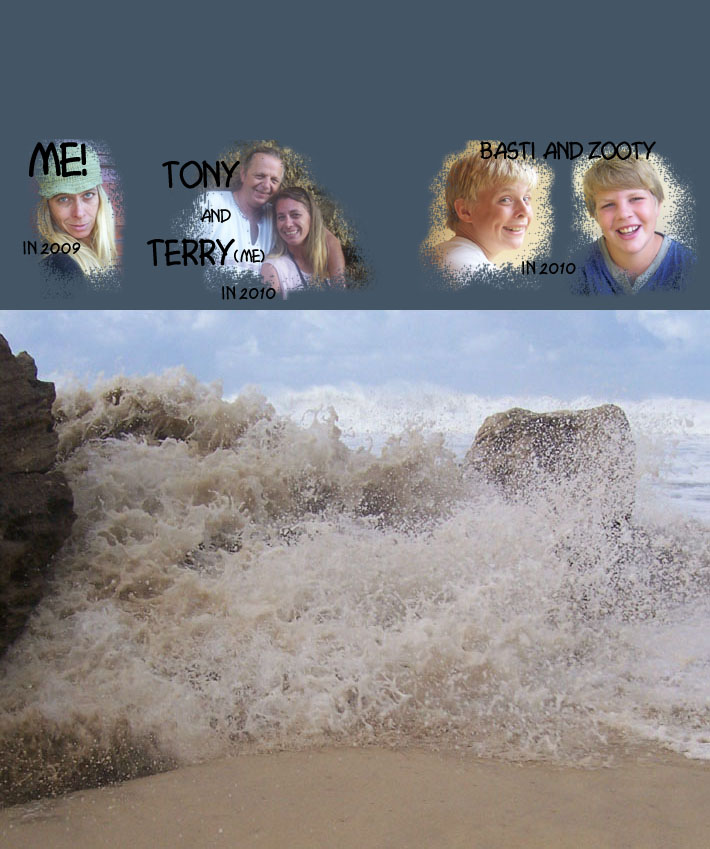
I decided that I’d like to see people (myself, Tony, and my sons) directly beneath the blog title and description, before (above) the top of the wave image.
I already knew the width of a new file I wanted to create in Photoshop (710 pixels) and knew that the height of the description text area was 130 pixels. I knew I wanted my “people banner” a bit taller than my description area, so just decided to make it 180 pixels.
So now had to create a new background “file/image” for all three “banners” –
The height of my wave image, the height of my description area, as well as the height of my new, planned “people banner.”
I made my people banner separately, placed the wave image at the bottom of the file waiting for it, placed the description area at the top of that same file waiting for it, and placed my new people banner between them (all fitting snugly onto the file/background in Photoshop.)
I saved the new image, and will use it as my template when deciding on different images for it later.
I opened it up in Photoshop again, and saved it with a different name (actually just put the word “fun” at the end), and then messed about a bit in Photoshop, having that fun I mentioned, using the colour picker, text, and a splattery kind of brush tool.

Then loaded my image and I had a customized Blogger header banner!
UPDATE: I've since changed the theme of my Blogger blog - the image I used as a header banner in my old theme appears at the bottom of every page on this blog.
© copyright Teresa Schultz 2010
No comments:
Post a Comment
Hello, and thank you for leaving a comment!